Thursday, February 13, 2014

** PATTERN ** SALE **

**Sale runs through midnight Feb. 16 ** 


 Click Here for MY WEBSITE

BUY 1
GET 1 FREE
E-PATTERNS
PAPER PATTERNS


**Sale runs through midnight Feb. 16 **


Saturday, February 1, 2014

Happy February - Early Works

Happy February!

I've got some goodies in


I'd be honored if you'd stop by and take a peek!

We got ourselves some snow last night, but fortunately nothing like they were predicting. Yep, snow is pretty, but if you have to get out in it, it can be a bit challenging! 
Take care my friends!

Monday, January 13, 2014

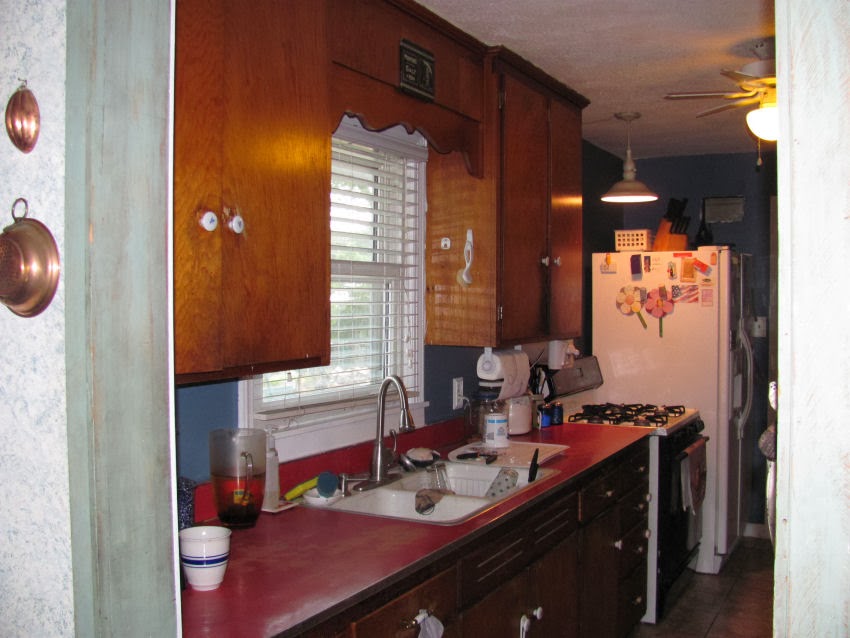
Kitchen Remodel


We spent the end of 2012 and pretty much all of 2013 remodeling our kitchen....doing what we could as we could. A project a good 20 years in the making! Of course now I know why my folks didn't get air conditioning until us kids were out of the house - less mouths to feed and a few extra pennies available! LOL

Anyway, I mentioned some time ago I'd share some pics and here's just a few. 
I do need to mention that some call this a "galley" kitchen... I've always called it a "hallway after thought!" Yeah it's small, but I really wanted to do something to make it appear bigger. And, of course, now the red Formica counter tops are back "in".  As for me, I guess I've just been retro and now ready to move on! hehehe

Here's one side: before


and after....
I love the white cabinets and dark blue counter tops!


I love the microwave over my 5 burner stove top!
Now I finally have more room for my big honkin' canners and pots!
If you can see it, there's one cutting board that has a pic of a lady doing laundry.
That was my gramma's. She passed in 2002 at the age of 98!


And the other side of the kitchen.... before....


 after!


I love my built in oven!
Getting older and the kind of work I do,
my back has issues, so not bending over to get something out of the oven or broiler is so awesome!


new pantry door...


I also love having room above the cabinets to put a few of my pretties!

To get the pic below I had to stand in the pantry! hawhawhaw


Well I love it and can't stop staring at it. If it was big enough to have a little tiny kitchen table and a couple of chairs I'd probably just sit in there and ooohhh and ahhhh. 

Thanks for stoppin' by!

Blessings
Debbie

Friday, January 3, 2014

** 2014 **

Found another use for a prim olde fluted pan..... 


 Well would ya look at that!


Who needs a fancy candy dish! This works perfect!
Hope your 2014 is starting out wonderful... 
here... it's making me wish for Spring now!! ;o)


Wednesday, January 1, 2014

New Year and New Goodies for Early Works!

Happy New Year!
I've got some new goodies in my


MY EARLY WORKS SHOPPE


I'd be honored if you'd stop by and check them out!

Hope everyone had a wonderful time ringing in the New Year's!

Blessings


Wednesday, December 25, 2013

Merry Christmas!!


Wednesday, December 18, 2013


Thursday, December 12, 2013

Peanut Butter Cups!

I came across this recipe for Reece's Peanut Butter Cups a few years ago. Ever since, I've made them at Christmastime and give to my kiddos. You can freeze them, however, I would be unable to tell you how long they last in there because my kids devour them so fast! ;o)

~ Below is how they look in progress ~
From left to right:
* bottom and sides filled with chocolate *
* center filled with peanut butter mixture *
* top chocolate layer *
Ya, I'm a little messy


Ingredients:

1 cup peanut butter (creamy)
1/3 cup powdered sugar
1 (12oz) pkg. chocolate chips
1/4 teaspoon salt

In small bowl mix the peanut butter and powdered sugar until firm. Set aside.
Melt chocolate chips in double boiler over hot, not boiling water. You may also melt them in microwave on high, stirring every minute. Add the salt.
Grease muffin tin cups/papers and spoon some chocolate into each cup, filling about halfway.
With spoon, draw chocolate up edges of each cup until sides are coated. Cool in fridge til firm.
Spread about t. of peanut butter onto chocolate in each cup, leaving room for final chocolate layer. Pour or spoon chocolate on top of each candy and spread to edges.
Let sit at room temp or covered in fridge. Turn out of pan when firm.

************


I double this recipe and get a good 42 or so of the small p.b.cups.
I've tried them in the big muffin tins - whoa - way too big and way too much!  But if you don't have the mini, just fill tins half way, unless you want giant mutant p.b.cups! hehehe
So, I'd suggest the mini muffin tins - use the papers and spray them with butter cooking spray.
If you don't have the papers, you can use just the tins and spray them too.
I just think they store better and look cuter in the little paper cups.

Enjoy my friends!

Friday, December 6, 2013

Just Sharin' * And Happy Friday!

Morning all! Wanted to share a couple of scriptures from my morning devotion.
Have a blessed day my friends!


Love the Lord your God with all your heart and with all your soul and with all your strength.

Deuteronomy 6:5


Whatever you do, work at it with all your heart, as working for the Lord

Colossians 3:23


Monday, December 2, 2013

Christmas at Early Works!

 I almost forgot.....
there's a little bit of Christmas in my


MY EARLY WORKS SHOPPE